hi all! i finished a project. yay!
it all started a few months ago when i found this baby at goodwill.
kinda cute, right? they were asking $10 for it! what? it didn't even have all the parts plus it was super wobbly. i talked them down to $5. nothing a little love can't take care of... well, maybe it takes a bit more than just love... the bottom basket used to be just like the blue and pink ones. i took it apart when i got it home to get started on making new ones. i took it apart so i could figure out how to make new ones but it was harder than i thought. thus, being put off until now.
i found a super cool tutorial on how to make fabric covered boxes on the smallest sparrow blog. she explained it in three posts which you can see
here,
here, and
here. and this is my version, very similar but a few tweaks.
first i measured the existing baskets.
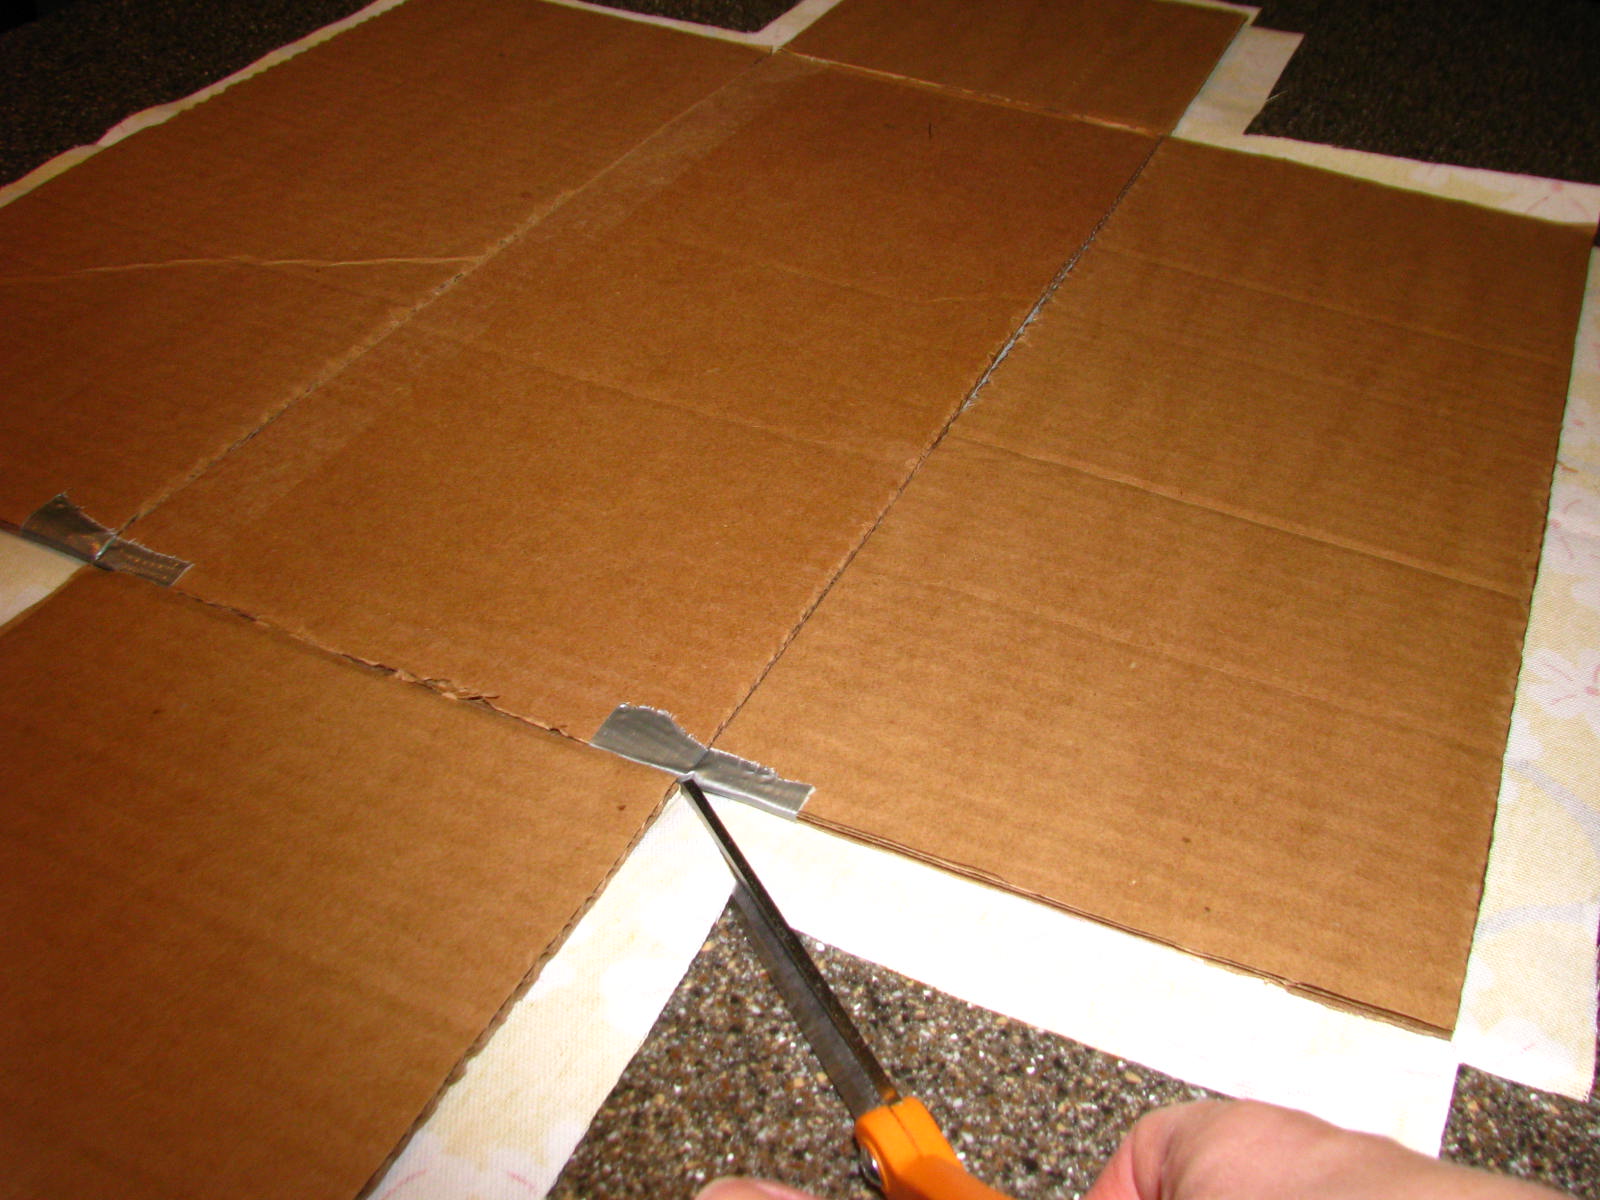
then i rummaged through the trash to find some boxes to use. yep, the trash. don't judge...it was free. then, i measured out my pieces.
and then cut them all out. shew, my hand hurt.
now it was time to piece it together. i laid out each box then taped the pieces together using duct tape.
with my fabric folded in half, right sides together, i traced the box on it. i also traced a second line about 1 inch from the first tracing.
next i cut the tracings out. be sure to keep your fabric doubled so you cut two pieces at the same time. you can see a third line in the picture below. it is 1/8 inch from the second line. this is to take in account the thickness of the cardboard. i know, confusing right now, but it works. once you have cut all the pieces out, you are ready to prep the inside box piece. (that is the piece with the tracings on it) fold each edge to the 1/8 inch tracing. i glued it using tacky glue. then i ironed it to "set" the folds.

after all edges are glued and ironed down, you are ready to work on putting the fabric on the boxes. to do this you will use the second piece of fabric. (the one without the tracings) lay your fabric piece wrong side up. apply mod podge to the center piece of the box. then flip the box over onto the fabric and press it down. make sure it is lined up correctly! flip it back over and smooth out the fabric so there are no wrinkles. continue the same process for each flap of the box.
snip the fabric on each inside corner to help you with the next folding step.
you need to wrap the fabric around the edges and glue it down. the corners need folded like when you are wrapping a gift.
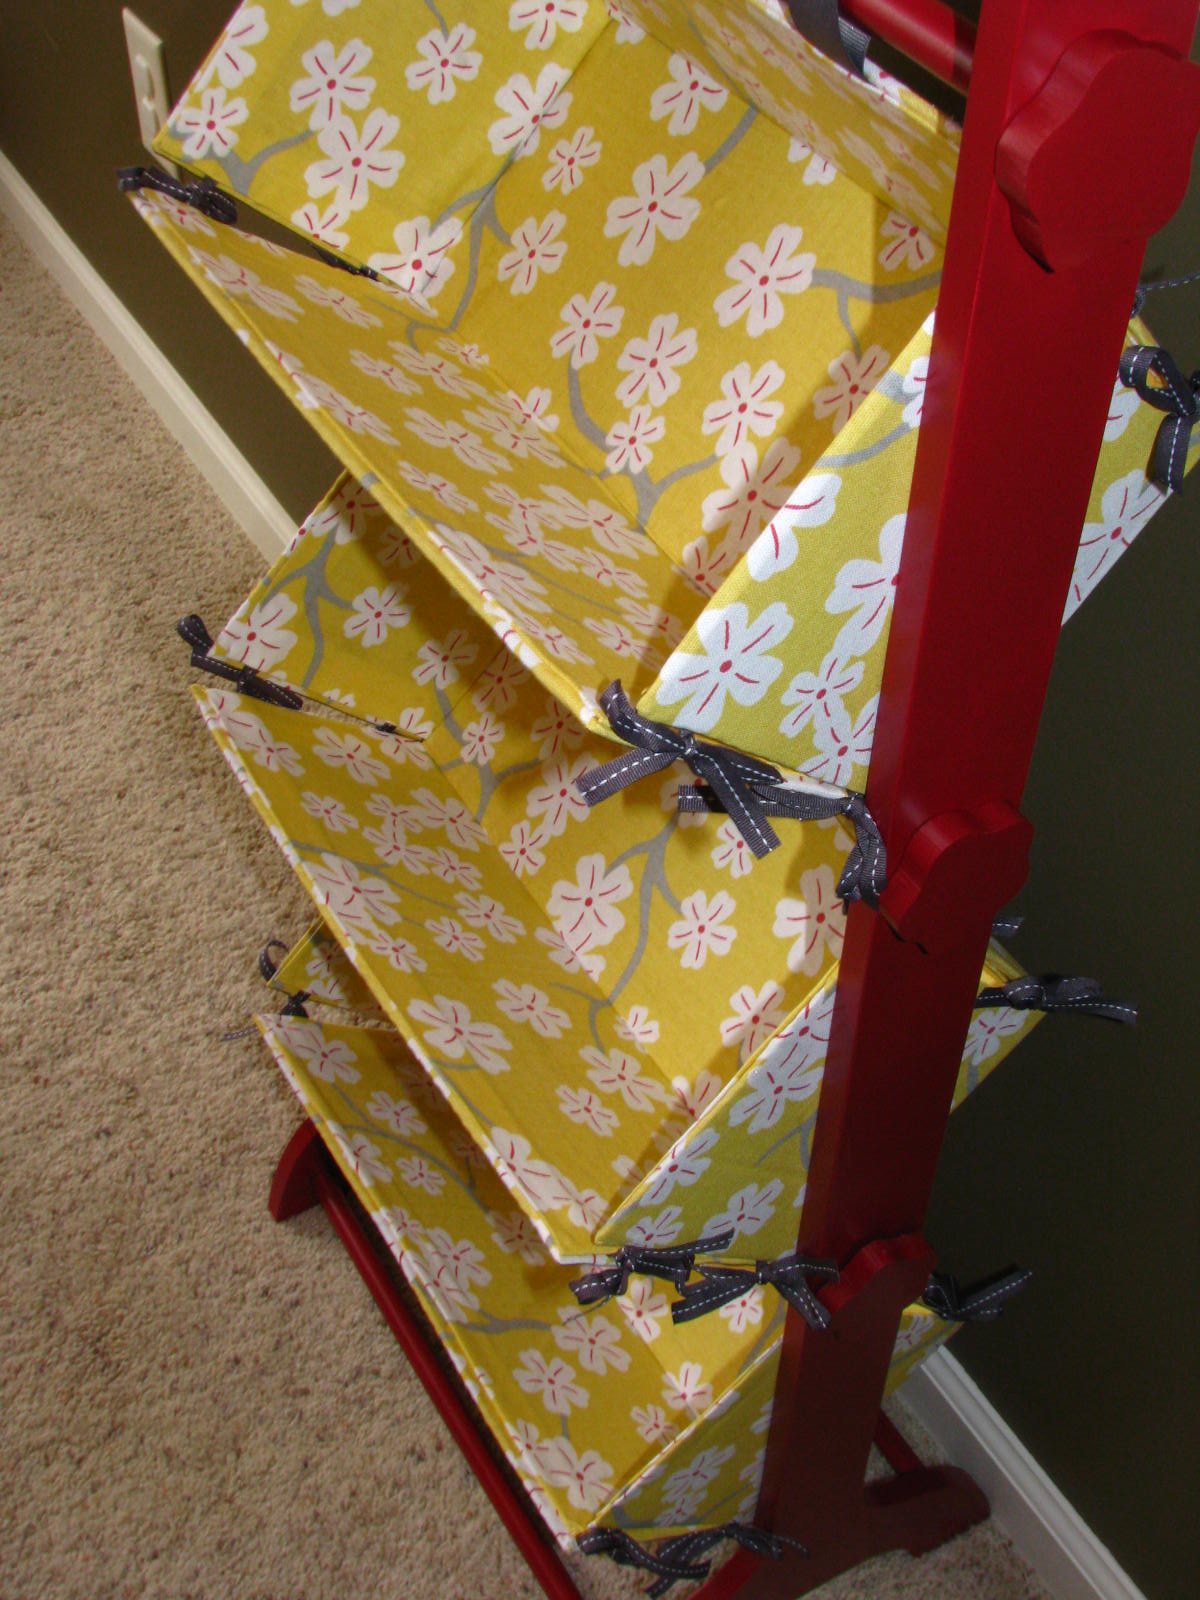
i added clothespins to the corners to help keep them down while it dries. when you are finished with this step, it should look something like this...
i let my boxes dry overnight before starting the inside. this step is much like the outside step without having to wrap the fabric around the edges. you also have to add the ribbon during this step. unfortunately, i totally spaced taking pictures of this step!! whoops! still new to this blogging tutorial thing...luckily, you can check out how to do it
here. i did a couple things differently. one--i added two ribbon loops to one of the long edges because my boxes need to hang on my toy tower. two--i could NOT get my sewing machine to cooperate. it would not sew through my box at all, so i reinforced all my ribbon by using hot glue to attach it to the inside of the boxes.
after i finished the inside of the boxes, i propped them up using some mixing bowls and let them dry overnight again. if you prop them, your boxes will dry in a boxy shape which helps NOT put so much stress on your ribbons to tie them shut.
now for the frame. time for spray paint. i used rustoleum in colonial red. very pretty. thank heavens for the nice weather! i was able to get a couple of coats on the frame outside! yay! not stinky, fumey garage!
here's the final product... she is so pretty! i love the fabric against the red frame. :)
not too bad, eh? from trash to treasure :)